Pages

Friday, March 29, 2013

Game Session 2013/03/24

Sophie O'Griffin, human, the leader and ringmaster. Played by Echo.
Esmond Gellert, human, trick-shot archer and dog trainer. Played by Mike.
Ganz, elf, stage magician and wizard. Played by Jessica.
Quexechetl, lizard man, strongman and wrestler. Played by Karl.
Talman, half-elf, acrobat. Played by Joe.
Fiorio, human, a peasant with a knack for playing to the crowd that the circus picked up along the way. Played as an NPC.

June 30, 850, in the cellar of a ruined wizard's tower in the Bekel

When we last saw our heroes, they had just scrambled to safety in an underground chamber below a ruined wizard's tower, while undead orcs prowled around outside, held back only by a magical ward. It was an hour or so after midnight, and they had no idea how long the ward would last.

The chamber was circular with a corbel dome, and somewhat smaller in diameter than the ruined tower above. Inside, a table and chair stood against the wall on one side, a cabinet against on the other side, and on the floor was a circle of dwarven symbols. Ganz immediately recognized that the cabinet had a magical aura.

The cabinet stood a bit taller than a dwarf, and had two full-length doors in front. It was covered with square panels divided by broad X-shapes, six on the front and three on each side. Quexechetl immediately tried to open it. It was locked, but a key lay on top, easily spotted by someone of Quexechetl's height. Inside, the cabinet was divided by a partition down the middle, with shelves on the right and pegs on the left, presumably for hanging clothes. There were some crumbled bits of cloth on the floor on the left, and the shelves held a handful of bottles with dried-up stains at the bottoms. There were also a couple of pen quills. One of the bottle appeared to have held ink, but the rest of the contents were unidentifiable.

The table also held a few dried-up bottles, but was otherwise unremarkable. Ganz inspected the circle of symbols on the floor. He recognized some of them as being the same as the glyphs carved around the outside of the tower, and tentatively identified the design as a summoning circle, but he wasn't familiar enough with dwarven magic to say more.

Quexechetl tried to move the cabinet, but it was firmly fixed to the wall. The performers then began experimenting with the cabinet in order to discover its magic, getting inside, pushing and pulling on the pegs, rapping on it, and so on. They discovered that the shelves could be folded up toward the center partition, and that then the partition could be folded back to the right side, leaving the whole interior of the cabinet undivided. When this was done, the pegs could be pushed in so that they were flush with the inside back wall.

"I feel like I'm in one of those video games where you just click on everything to figure out how the puzzle works."
Echo (Sophie)

Sophie discovered that the X-shapes on the panels on the outside could be pressed inward with a click, and she and Talman tried clicking them in various combinations to see if something would happen, but they didn't get anywhere. Ganz took a more methodical approach and discovered that if he clicked in the top Xes, he could then turn them, and this released the cabinet from the wall. Quexechetl moved it aside, and behind it there was a passage leading away from the underground chamber.

The circus members filed into the passage and dragged the cabinet to cover the entryway behind them. As soon as they left, Ganz felt that the magical barrier holding the dead orcs back had collapsed. Their way lit by Sophie's lantern, they went down and, as far as they could tell, parallel to the mountainside. After a few gentle turns, they emerged into the night air from a crack between two boulders.

It was very dark, the moon having set a couple of hours ago. They could see the fires of King Miklo's army, and the vague shadows of the host of dead orcs who were fighting them, in the valley below them, about a mile or so north. Esmond, who wore the night-seeing pendant below his clothes, could see as clearly as day, and noticed a group of figures standing on a rocky promontory across the valley, something like a quarter mile away.

Quexechtl immediately wanted to go join the fighting, and after a brief debate, the rest of the performers decided that getting a better view of the group on the promontory was a better idea than simply hiding and waiting until dawn. Sophie didn't like the idea of taking on twenty orcs, but she went along with the majority opinion. She tried to keep her lantern as well-covered as she could, and they all stumbled down the dark mountainside.

As they grew closer, Esmond could see, first, that they were indeed orcs, and later that one of them carried a staff of some kind. He counted about twenty of them, although the uneven, rocky ground could have hidden some more. A couple hundred yards away, they stopped and made a plan. Esmond would creep around to the right, which would put him to the orcs's rear, assuming they were watching the battle below them. He would get close enough to take an aimed shot at staff-bearer's heart, hoping to kill him with one arrow. The rest would move forward directly, and when close enough, Ganz would cast a spell to throw an exploding fireball at them. This would be the signal for Esmond's shot.

Ganz was a little dubious of this plan, since his power over magical forces was a little low, but he relented and agreed. Esmond left to make his flanking maneuver, and the rest crept forward in the darkness. At about twenty-five yards, they stopped, and Ganz cast his spell. It flared up, and he held a fireball in his hand. A very good one, he felt, and aimed it as well as he could in the darkness.

Esmond, as he got closer, saw that the orcs were a mixed group of the living and the re-animated dead, with the dead orcs forming a perimeter around the living. He also noticed that one of the orcs carried a shield, and appeared to be in command, given his body language. Hoping that Ganz's spell would kill the staff-bearer, he switched targets and took aim at the orc leader.

Ganz threw his fireball, but his aim was bad. Missing the staff-bearer, he instead hit another orc a few yards away. With a great boom, it exploded, throwing all the orcs into confusion. On this signal, Esmond loosed his arrow and caught the commander solidly in the back.

But the commander did not fall, and quickly shouted orders to his troops. He started getting them into a line of battle facing toward Esmond, where the arrow had come from. Talman and Quexechetl ran forward while Esmond drew another arrow. Sophie drew her own bow, and Ganz moved forward slowly, wondering if he could come up with any way to control the undead orcs.

Esmond's second shot stuck the staff-bearer, who fell on his face and laid there unmoving. Talman and Quexechetl reached the ring of dead orcs that surrounded the live ones and attacked two of them, Talman with a spear and Quexechetl with a grapple and a bite. Sophie aimed and took a shot at the prone staff-bearer with her bow, but in the darkness she badly missed and ended up dropping her bow.

"Darn, I was hoping that taking out that guy would kill all the zombie orcs."
Mike (Esmond)


Esmond shot a couple more times, but the commander blocked the arrows easily with his shield. Talman and Quexechetl's attacks hit home on the dead orcs, but didn't drop them. Their targets fought back with spear and axe, but didn't land any blows.

Esmond, seeing things much more clearly than anyone else, realized that the dead orcs weren't advancing on him -- instead they had turned on the live orcs, and the living and the dead were now locked in battle! He began to run toward the other group, shouting for everyone to fall back.

Talman ran back toward Sophie and Ganz, and so did Quexechetl, after Sophie shouted at him. One of the dead orcs followed, but the rest attacked their live counterparts. Quexechetl turned to take on the lone dead orc, sinking his teeth into its neck and then wrenching until the head came off. The body fell, no longer animated, and Quexechetl was a little disappointed that the head stopped moving as well.

A few yards away, the battle between the living and the dead tilted in favor of the latter, and the commander fell. Four surviving living orcs fled into the night, and the dead ones simply milled around senselessly. Esmond lured the group of them away from the fallen staff-bearer, while Talman ran in and grabbed the staff. He carried it back to the others. It was an unremarkable wooden staff, decorated only by a dead bird attached to the head.

The circus then turned back to the larger battle below them in the dark, wondering how King Miklo's army was faring against the horde of dead orcs.

So, how did that go?

For the second time in the two-year history of this game, the players did pretty much the right thing the whole way through. They didn't figure out what was magical about the cabinet, but they stopped fiddling with it when they discovered an escape route. I put a secret one-hour time limit on the magical protection that kept the dead orcs outside the tower, and the party left right before it expired.

Then when they left, Esmond made his perception roll to spot the orc shaman and his guards, the party went straight there, and they correctly guessed that the guy with the staff was commanding the dead orcs. You could criticize Mike for switching targets from the shaman to the orc leader at the last minute, but that turned out fine. The leader made a very good Tactics roll just after getting shot, and managed to rally his troops, but when Esmond shot the shaman (killing him instantly), the dead orcs all went uncontrolled and started attacking the nearest visible living targets. The orc leader was already in negative hit points from Esmond's first shot, so it was only a matter of time before he dropped. The living orcs never really had a chance.
Wednesday, March 27, 2013

GURPS Combat Choices: Deceptive Attack and Telegraphic Attack

Update: Martin Leuschen pointed out an error in the table, since fixed. My thanks to Martin for keeping my honest.

Patric Halter over at Renovating the Temple beat me to it with this post, but here is my take on Deceptive Attack and Telegraphic Attack.

In GURPS combat, Deceptive Attack is a combat option that lets you penalize your opponent's defense by -1 for every -2 you take to your attack roll. The only limits are your GM's indulgence, and a minimum final skill level of 10.

Telegraphic Attack, on the other hand, is a combat option that goes in the other direction: you can add +4 to your attack skill, but your opponent's defense increases by 2. Unlike DA, you don't get to pick how much Telegraphic Attack you want to use: it's +4/+2 or nothing. Also, TA doesn't affect your chances of scoring a critical hit. To determine if you got a critical, you use the skill you had before adding the TA bonus.

So, when do you want to use Telegraphic Attack? When do you want to use Deceptive Attack, and how much? Here's a handy table I made.

Defense
Attack 3 4 5 6 7 8 9 10 11 12 13 14 15 16 17 18 19 20
3 TA TA TA TA TA TA TA TA TA TA Flee Flee Flee Flee Flee Flee Flee Flee
4 TA TA TA TA TA TA TA TA TA TA TA Flee Flee Flee Flee Flee Flee Flee
5 TA TA TA TA TA TA TA TA TA TA TA Flee Flee Flee Flee Flee Flee Flee
6 TA TA TA TA TA TA TA TA TA TA TA Flee Flee Flee Flee Flee Flee Flee
7 TA TA TA TA TA TA TA TA TA TA Hold Hold Flee Flee Flee Flee Flee Flee
8 TA TA TA TA TA TA TA TA TA TA Hold Hold Hold Flee Flee Flee Flee Flee
9 TA TA TA TA TA TA TA TA Hold Hold Hold Hold Hold Flee Flee Flee Flee Flee
10 TA TA TA TA TA TA TA Hold Hold Hold Hold Hold Hold Flee Flee Flee Flee Flee
11 TA TA TA TA TA TA Hold Hold Hold Hold Hold Hold Hold Flee Flee Flee Flee Flee
12 TA TA TA TA Hold Hold Hold Hold Hold Hold DA 1 DA 1 DA 1 DA 1 Flee Flee Flee Flee
13 TA TA Hold Hold Hold Hold Hold Hold Hold DA 1 DA 1 DA 1 DA 1 DA 1 Flee Flee Flee Flee
14 Hold Hold Hold Hold Hold Hold Hold DA 1 DA 1 DA 1 DA 1 DA 2 DA 2 DA 2 DA 2 Flee Flee Flee
15 Hold Hold Hold Hold Hold Hold Hold DA 1 DA 1 DA 1 DA 2 DA 2 DA 2 TA TA TA Hold Hold
16 Hold Hold Hold Hold Hold Hold Hold Hold DA 2 DA 2 DA 2 DA 2 Hold Hold Hold Hold Hold Hold
17 Hold Hold Hold Hold Hold DA 1 DA 1 DA 1 DA 2 DA 2 DA 3 DA 3 Hold Hold Hold Hold Hold Hold
18 Hold Hold DA 1 DA 1 DA 1 DA 1 DA 1 DA 1 DA 1 DA 3 DA 3 DA 3 DA 3 DA 1 DA 1 Hold Hold Hold
19 Hold Hold DA 1 DA 1 DA 1 DA 1 DA 2 DA 2 DA 2 DA 3 DA 3 DA 3 DA 4 DA 1 DA 1 Hold Hold Hold
20 Hold Hold DA 1 DA 2 DA 2 DA 2 DA 2 DA 2 DA 2 DA 2 DA 4 DA 4 DA 4 DA 4 DA 2 DA 2 Hold Hold
21 Hold Hold DA 1 DA 2 DA 2 DA 2 DA 2 DA 3 DA 3 DA 3 DA 4 DA 4 DA 4 DA 5 DA 2 DA 2 Hold Hold
22 Hold Hold DA 1 DA 2 DA 3 DA 3 DA 3 DA 3 DA 3 DA 3 DA 3 DA 5 DA 5 DA 5 DA 5 DA 3 DA 3 Hold
23 Hold Hold DA 1 DA 2 DA 3 DA 3 DA 3 DA 3 DA 4 DA 4 DA 4 DA 5 DA 5 DA 5 DA 6 DA 3 DA 3 Hold
24 Hold Hold DA 1 DA 2 DA 3 DA 4 DA 4 DA 4 DA 4 DA 4 DA 4 DA 4 DA 6 DA 6 DA 6 DA 6 DA 4 DA 4
25 Hold Hold DA 1 DA 2 DA 3 DA 4 DA 4 DA 4 DA 4 DA 5 DA 5 DA 5 DA 6 DA 6 DA 6 DA 7 DA 4 DA 4
26 Hold Hold DA 1 DA 2 DA 3 DA 4 DA 5 DA 5 DA 5 DA 5 DA 5 DA 5 DA 5 DA 7 DA 7 DA 7 DA 7 DA 5
27 Hold Hold DA 1 DA 2 DA 3 DA 4 DA 5 DA 5 DA 5 DA 5 DA 6 DA 6 DA 6 DA 7 DA 7 DA 7 DA 8 DA 5
28 Hold Hold DA 1 DA 2 DA 3 DA 4 DA 5 DA 6 DA 6 DA 6 DA 6 DA 6 DA 6 DA 6 DA 8 DA 8 DA 8 DA 8
29 Hold Hold DA 1 DA 2 DA 3 DA 4 DA 5 DA 6 DA 6 DA 6 DA 6 DA 7 DA 7 DA 7 DA 8 DA 8 DA 8 DA 9
30 Hold Hold DA 1 DA 2 DA 3 DA 4 DA 5 DA 6 DA 7 DA 7 DA 7 DA 7 DA 7 DA 7 DA 7 DA 9 DA 9 DA 9

Caveat: this table only considers Deceptive Attack and Telegraphic Attack. If you also considered Rapid Strike, Dual Weapon Attack, hit locations, or other combat options, things would change a lot. But that will have to wait for later.
The attacker's skill runs along the side, and the defense runs across the top. The entry for a given skill and defense shows your best choice. "Hold" means that you can't improve your chances with either a Deceptive Attack or a Telegraphic Attack; you're already at the best level. "Flee" means that no matter what you do, your attack is going to be worth less than zero. Yes, I mean that on your own turn, you are more likely to get hurt than to hurt your opponent. Might as well run away.

You probably don't want to waste time looking things up on this table all the time, so let me try to reduce this information to a few rules of thumb.

  1. Don't use Deceptive Attack if your opponent's defense is already at 3 or 4. 
  2. Don't use Deceptive Attack unless you can get your opponent's defense below 13.
  3. If the sum of your skill and your opponent's defense is above 24, try to bring it down to the range of 22 to 24. Each level of DA will reduce the sum by 3.
  4. If the sum of your skill and your opponent's defense is 19 or below, use Telegraphic Attack.
  5. But don't use Telegraphic Attack if your skill is above 13.
  6. If your opponent's defense beats your skill by 8 or more, don't even try making an attack this turn. 

These rules don't get you optimal results in all cases, but they cover most of the chart pretty well.

For those of you interested in all the math behind the scenes, for now I'll just say that in this table, I considered the value of a normal hit to be 1, and discounted it by the probability that it gets past the defense. Then I valued a critical hit on the attack at 1.3, a critical failure on attack at -1.5, and a critical failure on defense as worth an extra 0.1. A critical success on defense imposes a critical failure on the attacker, and so is also worth -1.5.

These numbers are somewhat arbitrary, and anyone could reasonably question them, but after fiddling around with various values, I find that they don't alter the results very much.

A more detailed explanation of the number-crunching behind the chart will have to wait for another day.


Monday, March 25, 2013

Show your RPG collection

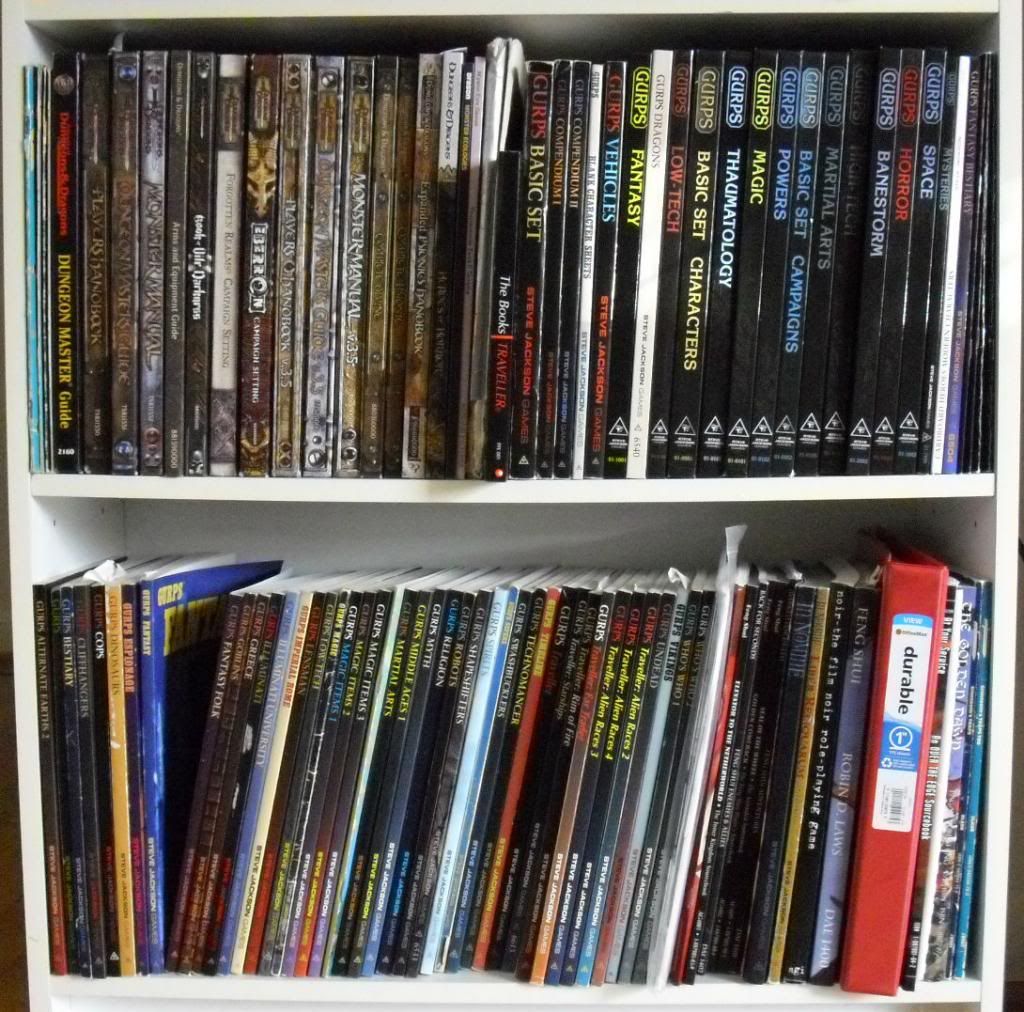
Inspired by the banner over at Jeffro's Space Gaming Blog, I have a challenge for all and sundry. Show us your RPG collection!

Here's mine.


This represents the combined collection that resulted from my marriage. I contributed the GURPS and the Paranoia. The D&D is mostly my wife's, but that's my copy of the Mentzer Expert set there at top left, plus a few modules. I used to have Basic, too, but that disappeared decades ago. And of course you can't see the PDFs.

So, what does your RPG collection look like?

Friday, March 22, 2013

The Henchmen -- a campaign idea

Since Jason Packer posted an interesting idea for a fantasy setting the other day, and Douglas Cole has been embellishing on it, I thought it would be an opportune time to post a campaign idea I had.

Name: The Henchmen

Genre: Dungeon Fantasy

The Setting: Any Dungeon Fantasy world, or any setting that enables dungeon crawling at all

The Team: Sure, adventurers get all the credit, but they didn't loot that dungeon alone, did they? Did they carry all their own provisions? Polish all their own armor? Bandage all their own wounds? Of course not! You did. You are a henchman in the employ of the Heroic League of Mylenbrak, a legendary band of dungeon-delvers. You are perhaps a guard, a clerk, a cook, an acolyte, or even a mere torch-bearer. Where they go, you go -- but at a safe distance from the fire-breathing dragons and flesh-rending demons, of course.

The Mission: While the heroes enter the mysterious cave, you are supposed to stay behind and guard the horses. Oh, no, goblin attack! All right, this chamber has been cleared -- search for secret doors while we scout down the hallway. Oops, someone hit a switch and the door opened, revealing that thing, whatever it is. We're running low on healing herbs -- go foraging for some in that valley. Hey, nobody said there would be fairies here! Here, carry this magical figurine until we figure out what it does. What is this strange new voice in my head? Stay here while we scout out the lower level. It's been three days. Should we go and look for them?

The important thing here, since the adventurers are literally an entire party of GMPCs, is to keep them off-stage as much as possible and concentrate the game on what happens when the henchmen are left alone. Don't game out the climactic fight with the demi-lich, just say, "The heroes have gone down the stairs to the crypt. Now, while they're doing that, you're safe back here in the antechamber. But suddenly, the frescoes on the walls begin to move...." The NPCs are just there to serve up plots and then leave the PCs alone.

For a GURPS campaign, Dungeon Fantasy 15: Henchmen is an ideal source of character templates. I'd start the PCs at 125 points, because I think 62 points is just too low. Played straight, the PCs could gain experience and eventually become full-fledged adventurers heading up their own parties. The players would have the advantage of getting to know how the GM's world works before they have to set out on their own, so it might be less lethal than most DF games. Played for laughs, Nodwick style, the PCs become mightily competent henchmen as they gain experience, but they always remain henchmen.

I think the big trouble would be coming up with a gaming group who want to play, or at least start as, low-powered peons in a world of high heroic adventure. I already run a fantasy game in which the PCs started at 130 points and are working their way up in the world, so I don't think it would interest my group. Sigh. Another campaign I'll probably never get to run.

Wednesday, March 20, 2013

GURPS Combat Choices: Thrust or Swing?

When a GURPS combatant is deciding what to do in an attack, one of the most basic decisions is whether to Thrust or Swing. In some cases, this is a straightforward decision, either because the weapon's listing doesn't give you any options (brass knuckles, for instance), or because Thrust and Swing attacks do the same kind of damage, but Swings do more (a club, for instance).

But for many weapons, you face a choice between a Thrust for Impaling damage and a Swing for Cutting damage. The Thrust does less damage, but Impaling gets a x2 wounding modifier, versus a x1.5 modifier for Cutting. When does the greater damage for a Swing outweigh the smaller wounding modifier?

A few days ago, I posted a table showing the thrust and swing damage from all weapons with swing-cutting damage and thrust-impaling damage. Grouped according to their damage characteristics, these weapons fall into 23 classes (which number I attribute the the Illuminati at work). In the table below, I've listed each weapon class, with entries for each level of Strength from 5 to 20. The entries show the expected benefit in injury from making a thrusting attack versus a swinging attack. Negative numbers, with a blue background, mean that you are better off thrusting than swinging. Positive numbers, with a yellow background, mean that it's a better bet to swing. Remember, this is injury, not damage. The numbers in the chart reflect what you get after applying the wounding modifier.

5 6 7 8 9 10 11 12 13 14 15 16 17 18 19 20
Katar -2 -2 -3 -3 -4.01 -3.51 -4.33 -3.33 -4.39 -3.11 -3.72 -2.25 -3.47 -2 -2 -2
Pata -3.51 -3.51 -4.33 -4.33 -5.33 -4 -4.5 -3 -4.25 -2.75 -3.25 -1.75 -3 -1.5 -1 0.5
Large Katar-LT -2.67 -2.67 -3.51 -3.51 -4.33 -3.33 -4 -2.5 -3.72 -2.25 -2.75 -1.25 -2.5 -1 -0.5 1
Main Gauche -1.34 -1.34 -2 -2 -2.67 -2.17 -2.67 -1.67 -2.39 -1.11 -1.72 -0.25 -1.47 0 0 0
Longsword 2 -2.67 -2.67 -3.33 -3.33 -4 -2.5 -3 -1.5 -2.75 -1.25 -1.75 -0.25 -1.5 0 0.5 2
Saber -1.67 -1.67 -2.17 -2.17 -2.67 -1.67 -2 -0.5 -1.72 -0.25 -0.75 0.75 -0.5 1 1.5 3
Large Knife -1.34 -1.34 -1.67 -1.67 -2.17 -1.33 -1.67 -0.34 -1.11 0.28 -0.25 1.25 0 1.5 1.5 1.5
Bastard 2 -1.67 -1.67 -2 -2 -2.5 -1 -1.5 0 -1.25 0.25 -0.25 1.25 0 1.5 2 3.5
Small Knife -1 -1 -1.34 -1.34 -1.67 -1.17 -1.33 -0.33 -0.73 0.55 0.28 0.28 0.28 0.28 0.28 0.28
Broadsword -1.33 -1.33 -1.67 -1.67 -2 -0.5 -1 0.5 -0.75 0.75 0.25 1.75 0.5 2 2.5 4
Jian -1.17 -1.17 -1.33 -1.33 -1.67 -0.34 -0.5 1 -0.25 1.25 0.75 2.25 1 2.5 3 4.5
Long Knife -1.01 -1.01 -1.17 -1.17 -1.33 -0.33 -0.34 1.16 0.28 1.75 1.25 2.75 1.5 3 3.5 5
Glaive -0.34 -0.34 -0.5 -0.5 -1 0.5 0 1.5 0.25 1.75 1.25 2.75 1.5 3 3.5 5
Katana 1 -0.33 -0.33 -0.33 -0.33 -0.34 1.16 1 2.5 1.25 2.75 2.25 3.75 2.5 4 4.5 6
Kukri -0.67 -0.67 -0.51 -0.51 -0.33 0.67 1 2.5 1.94 3.41 3.25 4.75 3.5 5 5.44 6.94
Shortsword -0.51 -0.51 -0.33 -0.33 -0.33 1 1.16 2.66 1.75 3.25 2.75 4.25 3 4.5 5 6.5
Small Falchion -0.17 -0.17 0.67 0.67 1.34 2.67 3.5 5 4.75 6.25 6.42 7.92 7 8.5 8.78 10.28
Duelling Halberd 1.16 1.16 1 1 0.5 2 1.5 3 1.75 3.25 2.75 4.25 3 4.5 5 6.5
Katana 2 0.67 0.67 1 1 1.16 2.66 2.5 4 2.75 4.25 3.75 5.25 4 5.5 6 7.5
Halberd 2.66 2.66 2.5 2.5 2 3.5 3 4.5 3.25 4.75 4.25 5.75 4.5 6 6.5 8
Dao 1.33 1.33 2 2 2.5 4 4.16 5.66 4.75 6.25 5.75 7.25 6 7.5 8 9.5
Falchion 0.67 0.67 1.67 1.67 2.67 4.17 5 6.5 6.25 7.75 7.92 9.42 8.5 10 10.28 11.78
Large Falchion 1.67 1.67 2.66 2.66 3.5 5 5.5 7 6.41 7.91 7.75 9.25 8 9.5 9.94 11.44
Table 1: Advantage of average swing/cutting attack over thrust/impaling attack in points of injury

Let me just say right now that I'm posting this analysis as I do it. I don't know yet whether this is going to lead to something that will be useful at the table while actually gaming. I made these charts to see what general trends, if any, pop out, and also just for the hell of it. Will it ever pay off, or am I just noodling around? Stay tuned.

Here are the 23 weapon classes. Because GURPS Low-Tech changed the stats for some weapons, the large katar, shortsword, and cutlass appear twice, and are noted with (LT) in the list below. Some weapons can be wielded one-handed or two-handed, so these also appear twice. Note also that the naginata could be used one-handed with Broadsword skill in Basic Set, but Low-Tech removed that.

Eleven weapons are in classes by themselves:
  • Katar
  • Pata
  • Large Katar (LT)
  • Main Gauche
  • Longsword 2
  • Long Knife
  • Kukri
  • Small Falchion
  • Dao
  • Falchion
  • Large Falchion
I named the other twelve classes after the weapon in the class I thought was most prominent.
  • Saber -- saber, light edged rapier, large katar, shotel
  • Large Knife -- large knife, bladed hand
  • Small Knife -- small knife, bladed hand
  • Bastard 2 -- bastard sword 2-handed, naginata 1-handed, dueling bill, dueling glaive
  • Broadsword -- broadsword, bastard sword 1-handed, longsword 1-handed
  • Jian - jian, edged rapier, shortsword (LT), cutlass (LT)
  • Glaive -- naginata 2-handed, greatsword, bill
  • Katana 1 -- katana 1-handed, late katana 1-handed, cavalry saber, backsword, qian ku ri yue dao
  • Shortsword -- shortsword, cutlass
  • Dueling Halberd -- dueling halberd, light horsecutter
  • Katana 2 -- katana 2-handed, late katana 2-handed
  • Halberd -- halberd, heavy horsecutter
I should point out the rule on maximum effective ST (B270). Your maximum effective ST with a weapon is three times its ST rating. If your ST is higher than that, then you do damage as if your ST were at the lower figure. So given that small knives have an ST rating of 5, if your ST is higher than 15, you do damage as if your ST were 15. This affects the small knife, large knife, katar, and main-gauche classes.

So, what does this chart tell us? Some obvious points are confirmed. If you have a falchion, a weapon designed for swinging, then you should swing it. Conversely, patas are made for thrusting.

Also obvious: swing damage climbs faster with ST than thrust damage does, so stronger characters are better off swinging with weapons where weaker ones are better off thrusting. So even though patas are made for thrusting, when you have enough ST, swinging a pata makes sense.

There are also some non-obvious things that turn up. There is a middle range of weapons that are built to be versatile, and it's good to know how you can best gain the advantage of your Strength with them. At ST 13, there are several weapons you're better thrusting with, where the same weapons in the hands of a ST 14 character would be more useful at a swing.

The real oddity here is that some weapons go back and forth between swing-is-better and thrust-is-better as you go up in ST. That's an artifact of the way the Basic Damage table is structured, with swing damage going up every step, but thrust damage going up only every other step. This is especially noticeable with the Bastard 2 class. I imagine a master-at-arms teaching students to use a bastard sword two-handed: "Alright, I've lined you up from weakest to strongest. You lot, up to here, you're better off making thrusting attacks. Now, you fellows, from here to here, are better off swinging. But from here to here -- you'd better go back to thrusting. Now, from here on, again, swinging is better. Oh, except for you and you -- it doesn't matter which way you go."

It's silly, and more than a little unrealistic, but does it really matter? Here's Table 2, which shows expected swing/cutting injury as a percentage of expected thrust-impaling injury. As before, a blue background, where numbers are less than 100%, means you're better off thrusting, and a yellow background, where numbers are above 100%, means you're better off swinging.

5 6 7 8 9 10 11 12 13 14 15 16 17 18 19 20
Katar 33 33 25 25 25 34 38 52 51 65 66 80 73 85 85 85
Pata 34 34 38 38 41 56 59 73 67 79 78 88 82 91 94 103
Large Katar-LT 33 33 34 34 38 52 56 72 66 80 79 90 83 93 97 106
Main Gauche 43 43 33 33 33 46 50 69 66 84 81 97 87 100 100 100
Longsword 2 50 50 52 52 56 72 73 86 79 90 88 98 91 100 103 111
Saber 44 44 46 46 50 69 71 93 81 97 93 107 96 108 111 121
Large Knife 43 43 44 44 46 67 69 94 84 104 97 114 100 114 114 114
Bastard 2 69 69 71 71 72 89 86 100 90 102 98 108 100 109 111 119
Small Knife 50 50 43 43 44 61 67 92 86 110 104 104 104 104 104 104
Broadsword 67 67 69 69 71 93 89 106 93 107 102 113 103 113 116 125
Jian 61 61 67 67 69 94 93 114 97 114 107 120 108 119 121 132
Long Knife 57 57 61 61 67 92 94 122 104 125 114 131 114 127 129 142
Glaive 94 94 93 93 89 106 100 114 102 113 108 118 109 118 119 128
Katana 1 89 89 92 92 94 122 114 136 114 131 120 134 119 131 132 143
Kukri 67 67 78 78 89 122 125 163 136 164 146 168 139 156 154 169
Shortsword 78 78 89 89 92 125 122 150 125 146 131 147 127 141 142 154
Small Falchion 92 92 134 134 158 215 217 267 219 256 220 249 200 221 207 225
Duelling Halberd 122 122 114 114 106 122 114 127 113 125 118 128 118 126 128 136
Katana 2 122 122 125 125 122 150 136 157 131 147 134 148 131 142 143 154
Halberd 150 150 136 136 122 139 127 141 125 137 128 138 126 135 136 144
Dao 157 157 167 167 163 200 178 206 168 189 164 181 155 168 167 179
Falchion 134 134 184 184 215 279 267 317 256 294 249 277 221 243 225 243
Large Falchion 184 184 214 214 217 267 238 275 220 248 211 232 189 206 199 214
Table 2: Advantage of average swing/cutting attack over thrust/impaling attack in percent

In some cases, I would say it does matter. At the transition from blue to yellow, most values aren't that far from 100%, but a few are large enough to make me want to pay attention. The jian class, for instance, which includes the jian, the edged rapier, and Low-Tech versions of the shortsword and cutlass. At ST 12 and 14, you're taking a 14% discount if you're not swinging. There appears to be no simple way to describe the patterns here, so I guess you just have to know where your advantages are. That's not that bad a problem, since most characters don't change weapons very often, and change ST even less often.

Overall, I think the chart shows that GURPS does a pretty good job of delivering results. The see-sawing effect with with some of the weapons in the middle range looks weird, but it doesn't look broken. I can live with a 14% difference in the blue-yellow border area. For the other weapons, the takeaway lesson is that you should try to use them as they were designed to be used -- thrust with a knife, unless you're very strong. Swing with a polearm, if at all possible.

Now, what about the effect of hit location and Damage Resistance? DR comes off before the wounding modifier, the neck offers a x2 cutting modifier, and the vitals a x3 impaling modifier. I expect that will change things somewhat, but I'll have to take that up at another time.
For the rest of this post, I'm just going to describe how I arrived at the tables above, in case anyone wants to double-check my work. You can ignore everything below here if you're not into the heavy number-crunching.
After compiling the list of all the thrust-impaling/swing-cutting weapons, I found that their damage statistics ran from Thrust-2 to Thrust+3 and Swing-3 to Swing+5. I created tables listing the damage roll for each of these stats at ST levels from 5 to 20.

5 6 7 8 9 10 11 12 13 14 15 16 17 18 19 20
Thr-2 1d-6 1d-6 1d-5 1d-5 1d-4 1d-4 1d-3 1d-3 1d-2 1d-2 1d-1 1d-1 1d 1d 2d-3 2d-3
Thr-1 1d-5 1d-5 1d-4 1d-4 1d-3 1d-3 1d-2 1d-2 1d-1 1d-1 1d 1d 1d+1 1d+1 2d-2 2d-2
Thr 1d-4 1d-4 1d-3 1d-3 1d-2 1d-2 1d-1 1d-1 1d 1d 1d+1 1d+1 1d+2 1d+2 2d-1 2d-1
Thr+1 1d-3 1d-3 1d-2 1d-2 1d-1 1d-1 1d 1d 1d+1 1d+1 1d+2 1d+2 1d+3 1d+3 2d 2d
Thr+2 1d-2 1d-2 1d-1 1d-1 1d 1d 1d+1 1d+1 1d+2 1d+2 1d+3 1d+3 1d+4 1d+4 2d+1 2d+1
Thr+3 1d-1 1d-1 1d 1d 1d+1 1d+1 1d+2 1d+2 1d+3 1d+3 1d+4 1d+4 1d+5 1d+5 2d+2 2d+2
Table 3: Damage rolls for thrusting attacks by ST

5 6 7 8 9 10 11 12 13 14 15 16 17 18 19 20
Sw-3 1d-6 1d-6 1d-5 1d-5 1d-4 1d-3 1d-2 1d-1 2d-4 2d-3 2d-2 2d-1 3d-4 3d-3 3d-2 3d-1
Sw-2 1d-5 1d-5 1d-4 1d-4 1d-3 1d-2 1d-1 1d 2d-3 2d-2 2d-1 2d 3d-3 3d-2 3d-1 3d
Sw-1 1d-4 1d-4 1d-3 1d-3 1d-2 1d-1 1d 1d+1 2d-2 2d-1 2d 2d+1 3d-2 3d-1 3d 3d+1
Sw 1d-3 1d-3 1d-2 1d-2 1d-1 1d 1d+1 1d+2 2d-1 2d 2d+1 2d+2 3d-1 3d 3d+1 3d+2
Sw+1 1d-2 1d-2 1d-1 1d-1 1d 1d+1 1d+2 1d+3 2d 2d+1 2d+2 2d+3 3d 3d+1 3d+2 3d+3
Sw+2 1d-1 1d-1 1d 1d 1d+1 1d+2 1d+3 1d+4 2d+1 2d+2 2d+3 2d+4 3d+1 3d+2 3d+3 3d+4
Sw+3 1d 1d 1d+1 1d+1 1d+2 1d+3 1d+4 1d+5 2d+2 2d+3 2d+4 2d+5 3d+2 3d+3 3d+4 3d+5
Sw+4 1d+1 1d+1 1d+2 1d+2 1d+3 1d+4 1d+5 1d+6 2d+3 2d+4 2d+5 2d+6 3d+3 3d+4 3d+5 3d+6
Sw+5 1d+2 1d+2 1d+3 1d+3 1d+4 1d+5 1d+6 1d+7 2d+4 2d+5 2d+6 2d+7 3d+4 3d+5 3d+6 3d+7
Table 4: Damage rolls for swinging attacks by ST

The next step was to calculate expected injury for each of these damage rolls. It was not possible to take the average of 1d, 2d, or 3d and apply simple arithmetic because of two complications. First, the minimum damage for cutting and impaling attacks is 1. That means it's not possible to say that the average of 1d is 3.5, so the average of 1d-2 is 1.5. In fact, the average of 1d-2 with a minimum of 1 is the average of (1, 1, 1, 2, 3, 4), which is 2. Roughly a third of the damage rolls had to be treated this way.

Second, for a x2 injury modifier, you can simply multiply the average damage roll by 2, but because of rounding, you can't treat cutting damage the same. Injury is rounded down, which means that the possible damage results from 1d, which are (1, 2, 3, 4, 5, 6) with an average of 3.5, become (1, 3, 4, 6, 7, 9) with the cutting injury modifier of 1.5. This gives an average of 5, rather than an average of 3.5 * 1.5 = 5.25.

The upshot of all this calculating is shown in table 5, which gives the average of the damage, cutting injury, and impaling injury for all the die rolls I worked with.

Die Roll x1.5 x2
1d-6 1.00 1.00 2.00
1d-5 1.00 1.00 2.00
1d-4 1.17 1.33 2.33
1d-3 1.50 1.83 3.00
1d-2 2.00 2.67 4.00
1d-1 2.67 3.67 5.33
1d 3.50 5.00 7.00
1d+1 4.50 6.50 9.00
1d+2 5.50 8.00 11.00
1d+3 6.50 9.50 13.00
1d+4 7.50 11.00 15.00
1d+5 8.50 12.50 17.00
1d+6 9.50 14.00 19.00
1d+7 10.50 15.50 21.00
2d-4 3.28 4.61 6.56
2d-3 4.11 5.89 8.22
2d-2 5.03 7.28 10.06
2d-1 6.00 8.75 12.00
2d 7.00 10.25 14.00
2d+1 8.00 11.75 16.00
2d+2 9.00 13.25 18.00
2d+3 10.00 14.75 20.00
2d+4 11.00 16.25 22.00
2d+5 12.00 17.75 24.00
2d+6 13.00 19.25 26.00
2d+7 14.00 20.75 28.00
3d-4 6.52 9.53 13.04
3d-3 7.50 11.00 15.00
3d-2 8.50 12.50 17.00
3d-1 9.50 14.00 19.00
3d 10.50 15.50 21.00
3d+1 11.50 17.00 23.00
3d+2 12.50 18.50 25.00
3d+3 13.50 20.00 27.00
3d+4 14.50 21.50 29.00
3d+5 15.50 23.00 31.00
3d+6 16.50 24.50 33.00
3d+7 17.50 26.00 35.00
Table 5: Expected die rolls and injury for cutting and impaling attacks

Equipped with these results, I converted tables 3 and 4, showing damage rolls, to tables 6 and 7, showing expected injury for thrust and swing attacks.

5 6 7 8 9 10 11 12 13 14 15 16 17 18 19 20
Thr-2 2 2 2 2 2.33 2.33 3 3 4 4 5.33 5.33 7 7 8.22 8.22
Thr-1 2 2 2.34 2.34 3 3 4 4 5.34 5.34 7 7 9 9 10.06 10.06
Thr 2.34 2.34 3 3 4 4 5.34 5.34 7 7 9 9 11 11 12 12
Thr+1 3 3 4 4 5.34 5.34 7 7 9 9 11 11 13 13 14 14
Thr+2 4 4 5.34 5.34 7 7 9 9 11 11 13 13 15 15 16 16
Thr+3 5.34 5.34 7 7 9 9 11 11 13 13 15 15 17 17 18 18
Table 6: Average injury for thrust/impaling attacks by ST

5 6 7 8 9 10 11 12 13 14 15 16 17 18 19 20
Sw-3 1 1 1 1 1.33 1.83 2.67 3.67 4.61 5.89 7.28 8.75 9.53 11 12.5 14
Sw-2 1 1 1.33 1.33 1.83 2.67 3.67 5 5.89 7.28 8.75 10.25 11 12.5 14 15.5
Sw-1 1.33 1.33 1.83 1.83 2.67 3.67 5 6.5 7.28 8.75 10.25 11.75 12.5 14 15.5 17
Sw 1.83 1.83 2.67 2.67 3.67 5 6.5 8 8.75 10.25 11.75 13.25 14 15.5 17 18.5
Sw+1 2.67 2.67 3.67 3.67 5 6.5 8 9.5 10.25 11.75 13.25 14.75 15.5 17 18.5 20
Sw+2 3.67 3.67 5 5 6.5 8 9.5 11 11.75 13.25 14.75 16.25 17 18.5 20 21.5
Sw+3 5 5 6.5 6.5 8 9.5 11 12.5 13.25 14.75 16.25 17.75 18.5 20 21.5 23
Sw+4 6.5 6.5 8 8 9.5 11 12.5 14 14.75 16.25 17.75 19.25 20 21.5 23 24.5
Sw+5 8 8 9.5 9.5 11 12.5 14 15.5 16.25 17.75 19.25 20.75 21.5 23 24.5 26
Table 7: Aveage injury for swing/cutting attacks by ST

Next I listed the weapons and copied their expected damage for thrust and swing attacks from tables 6 and 7 to create tables 8 and 9. Note that maximum effective ST for the katar, main-gauche, and large knife classes is 18, and for the small knife class it is 15.

5 6 7 8 9 10 11 12 13 14 15 16 17 18 19 20
Katar 3 3 4 4 5.34 5.34 7 7 9 9 11 11 13 13 13 13
Pata 5.34 5.34 7 7 9 9 11 11 13 13 15 15 17 17 18 18
Large Katar-LT 4 4 5.34 5.34 7 7 9 9 11 11 13 13 15 15 16 16
Main Gauche 2.34 2.34 3 3 4 4 5.34 5.34 7 7 9 9 11 11 11 11
Longsword 2 5.34 5.34 7 7 9 9 11 11 13 13 15 15 17 17 18 18
Saber 3 3 4 4 5.34 5.34 7 7 9 9 11 11 13 13 14 14
Large Knife 2.34 2.34 3 3 4 4 5.34 5.34 7 7 9 9 11 11 11 11
Bastard 2 5.34 5.34 7 7 9 9 11 11 13 13 15 15 17 17 18 18
Small Knife 2 2 2.34 2.34 3 3 4 4 5.34 5.34 7 7 7 7 7 7
Broadsword 4 4 5.34 5.34 7 7 9 9 11 11 13 13 15 15 16 16
Jian 3 3 4 4 5.34 5.34 7 7 9 9 11 11 13 13 14 14
Long Knife 2.34 2.34 3 3 4 4 5.34 5.34 7 7 9 9 11 11 12 12
Glaive 5.34 5.34 7 7 9 9 11 11 13 13 15 15 17 17 18 18
Katana 1 3 3 4 4 5.34 5.34 7 7 9 9 11 11 13 13 14 14
Kukri 2 2 2.34 2.34 3 3 4 4 5.34 5.34 7 7 9 9 10.06 10.06
Shortsword 2.34 2.34 3 3 4 4 5.34 5.34 7 7 9 9 11 11 12 12
Small Falchion 2 2 2 2 2.33 2.33 3 3 4 4 5.33 5.33 7 7 8.22 8.22
Duelling Halberd 5.34 5.34 7 7 9 9 11 11 13 13 15 15 17 17 18 18
Katana 2 3 3 4 4 5.34 5.34 7 7 9 9 11 11 13 13 14 14
Halberd 5.34 5.34 7 7 9 9 11 11 13 13 15 15 17 17 18 18
Dao 2.34 2.34 3 3 4 4 5.34 5.34 7 7 9 9 11 11 12 12
Falchion 2 2 2 2 2.33 2.33 3 3 4 4 5.33 5.33 7 7 8.22 8.22
Large Falchion 2 2 2.34 2.34 3 3 4 4 5.34 5.34 7 7 9 9 10.06 10.06
Table 8: Average thrust/impaling injury for various weapons by ST

5 6 7 8 9 10 11 12 13 14 15 16 17 18 19 20
Katar 1 1 1 1 1.33 1.83 2.67 3.67 4.61 5.89 7.28 8.75 9.53 11 11 11
Pata 1.83 1.83 2.67 2.67 3.67 5 6.5 8 8.75 10.25 11.75 13.25 14 15.5 17 18.5
Large Katar-LT 1.33 1.33 1.83 1.83 2.67 3.67 5 6.5 7.28 8.75 10.25 11.75 12.5 14 15.5 17
Main Gauche 1 1 1 1 1.33 1.83 2.67 3.67 4.61 5.89 7.28 8.75 9.53 11 11 11
Longsword 2 2.67 2.67 3.67 3.67 5 6.5 8 9.5 10.25 11.75 13.25 14.75 15.5 17 18.5 20
Saber 1.33 1.33 1.83 1.83 2.67 3.67 5 6.5 7.28 8.75 10.25 11.75 12.5 14 15.5 17
Large Knife 1 1 1.33 1.33 1.83 2.67 3.67 5 5.89 7.28 8.75 10.25 11 12.5 12.5 12.5
Bastard 2 3.67 3.67 5 5 6.5 8 9.5 11 11.75 13.25 14.75 16.25 17 18.5 20 21.5
Small Knife 1 1 1 1 1.33 1.83 2.67 3.67 4.61 5.89 7.28 7.28 7.28 7.28 7.28 7.28
Broadsword 2.67 2.67 3.67 3.67 5 6.5 8 9.5 10.25 11.75 13.25 14.75 15.5 17 18.5 20
Jian 1.83 1.83 2.67 2.67 3.67 5 6.5 8 8.75 10.25 11.75 13.25 14 15.5 17 18.5
Long Knife 1.33 1.33 1.83 1.83 2.67 3.67 5 6.5 7.28 8.75 10.25 11.75 12.5 14 15.5 17
Glaive 5 5 6.5 6.5 8 9.5 11 12.5 13.25 14.75 16.25 17.75 18.5 20 21.5 23
Katana 1 2.67 2.67 3.67 3.67 5 6.5 8 9.5 10.25 11.75 13.25 14.75 15.5 17 18.5 20
Kukri 1.33 1.33 1.83 1.83 2.67 3.67 5 6.5 7.28 8.75 10.25 11.75 12.5 14 15.5 17
Shortsword 1.83 1.83 2.67 2.67 3.67 5 6.5 8 8.75 10.25 11.75 13.25 14 15.5 17 18.5
Small Falchion 1.83 1.83 2.67 2.67 3.67 5 6.5 8 8.75 10.25 11.75 13.25 14 15.5 17 18.5
Duelling Halberd 6.5 6.5 8 8 9.5 11 12.5 14 14.75 16.25 17.75 19.25 20 21.5 23 24.5
Katana 2 3.67 3.67 5 5 6.5 8 9.5 11 11.75 13.25 14.75 16.25 17 18.5 20 21.5
Halberd 8 8 9.5 9.5 11 12.5 14 15.5 16.25 17.75 19.25 20.75 21.5 23 24.5 26
Dao 3.67 3.67 5 5 6.5 8 9.5 11 11.75 13.25 14.75 16.25 17 18.5 20 21.5
Falchion 2.67 2.67 3.67 3.67 5 6.5 8 9.5 10.25 11.75 13.25 14.75 15.5 17 18.5 20
Large Falchion 3.67 3.67 5 5 6.5 8 9.5 11 11.75 13.25 14.75 16.25 17 18.5 20 21.5
Table 9: Average swing/cutting injury for various weapons by ST

Finally, I used these two tables to compute tables 1 and 2, above.


Friday, March 15, 2013

That's how we roll

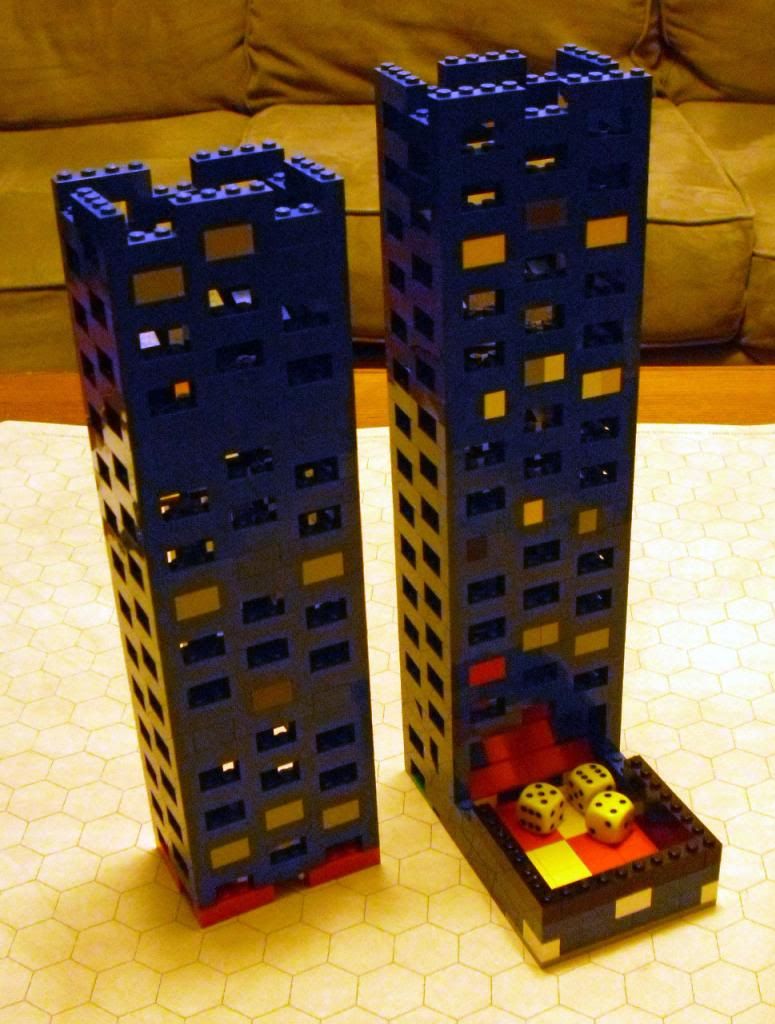
My gaming group has a thing for dice towers, it turns out.

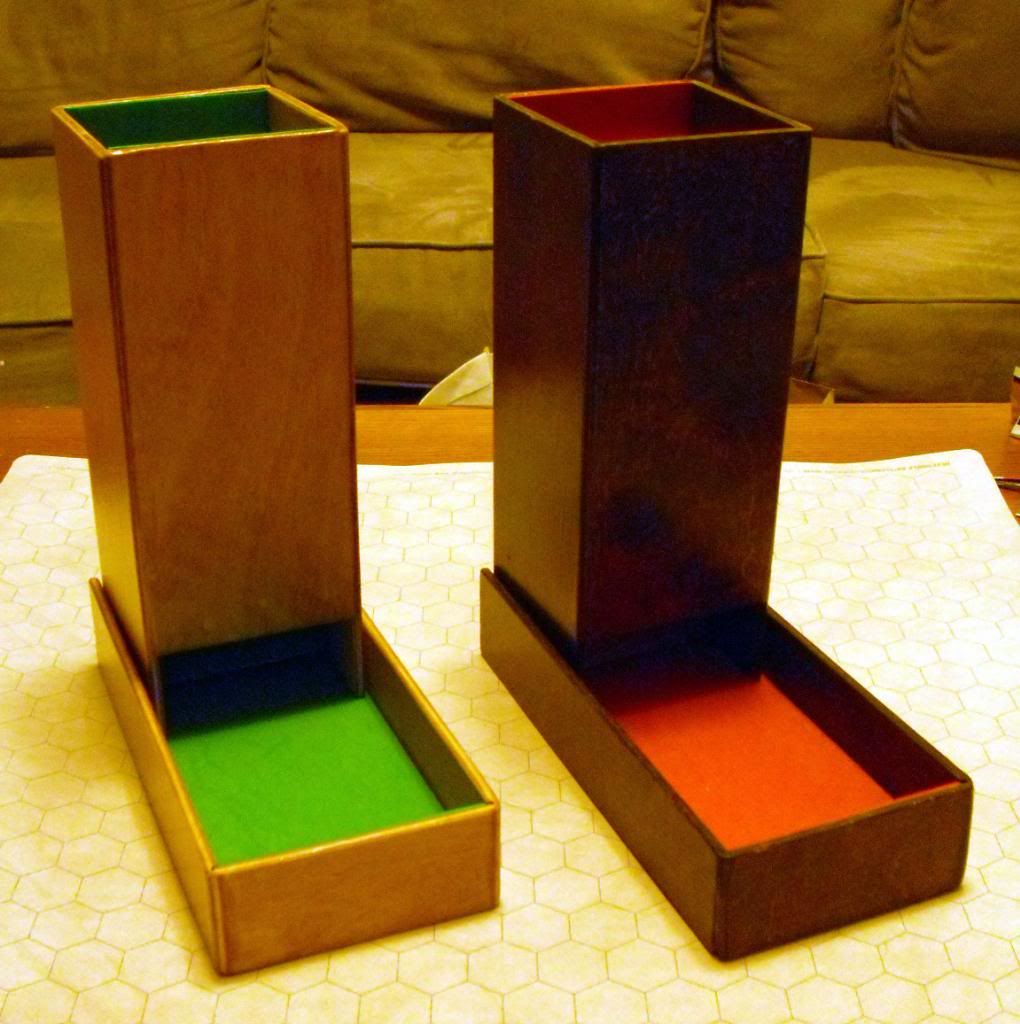
Mike started it with his dice tower, made by VixenTor.


His is the one on the right. VixenTor isn't around any more, sadly, because all of their production equipment and supplies were destroyed in a house fire.

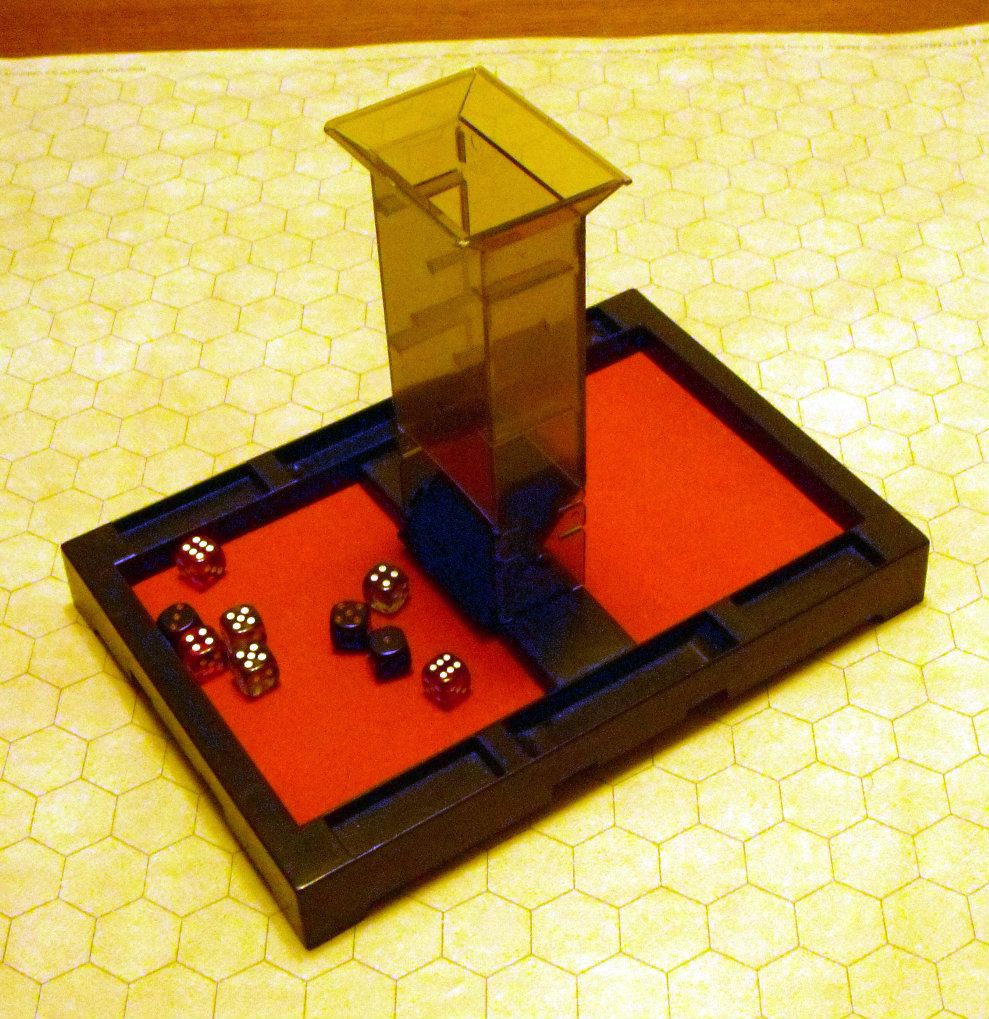
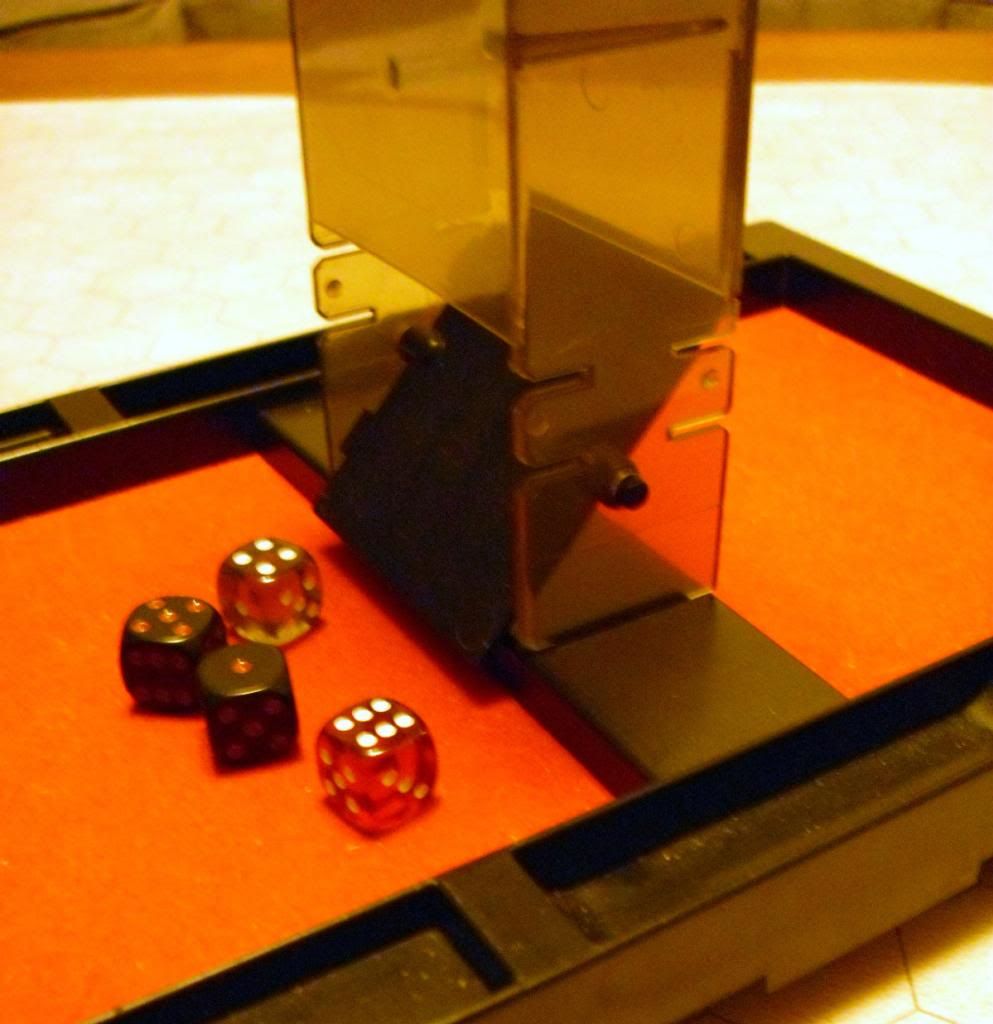
The other tower pictured above is actually Karl's, and he sometimes loans it to Echo, but he doesn't use it any more. Instead, he's got a dice tower he got form a thrift store in a copy of a board game called Chute-5.


It includes a tiltable panel at the bottom so you can make the dice fall either of the two trays, as you choose.


This seems almost useless, but I'm sure it was very important somehow to the game.

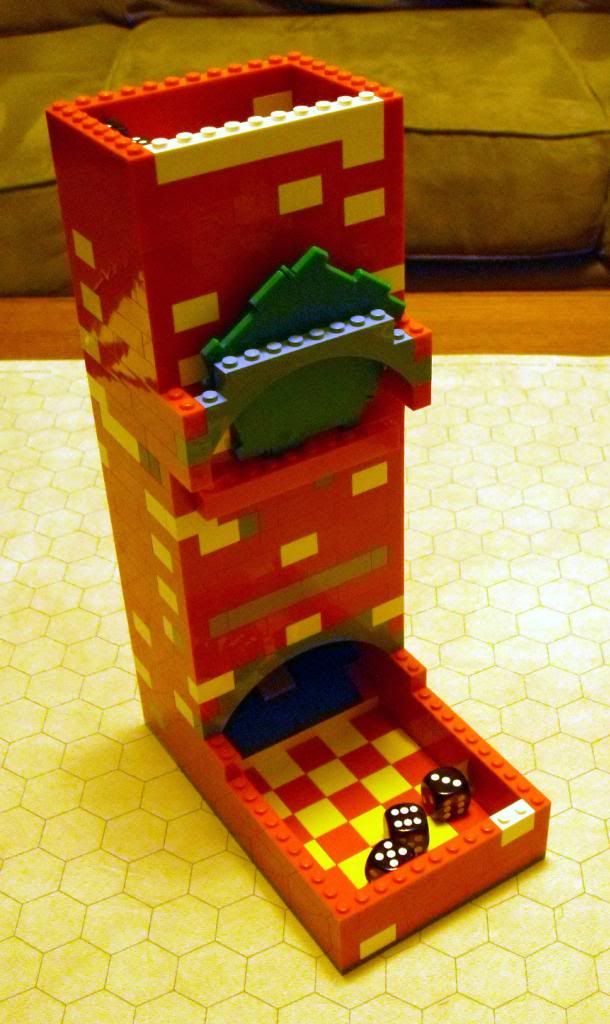
Jessica and I decided to make our own towers out of Lego. Here's hers.


She included a reroll-chit holder on the front. Because it's so annoying to lose track of your chit.

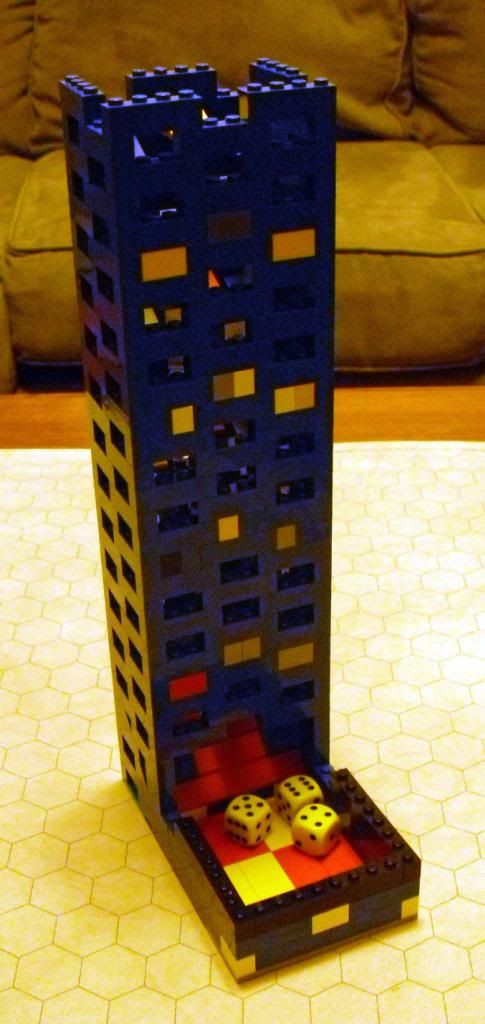
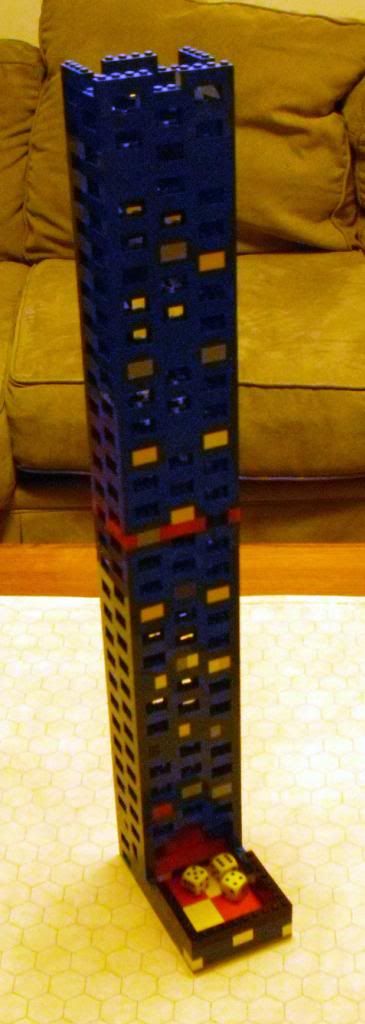
Jessica used plates to make side-to-side baffles in her tower. I opted for 2x3 low slopes to make front-to-back baffles, and a more open tower structure.


I also have an optional extension I can add on top, for when I need extra randomness.


At over 26 inches tall, it is easily the mightiest dice tower in the game.


You might think this is going a bit too far, but if you could see how random the numbers I get with this baby are, you'd have to admit it's worth it.

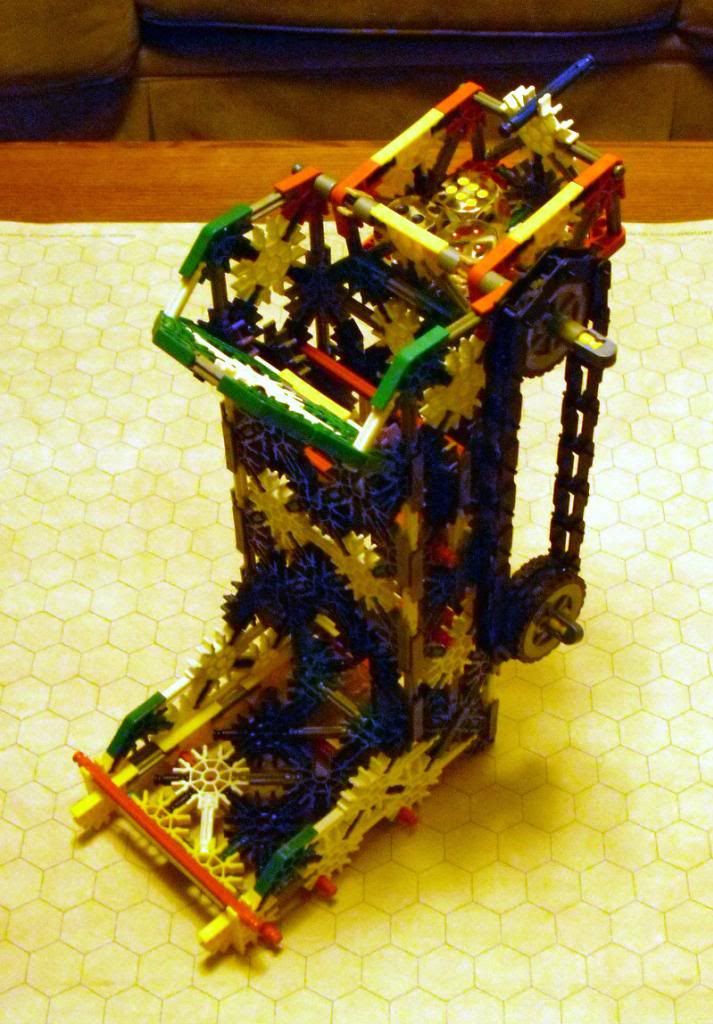
Joe, because he suffers from the delusion that K'Nex is in any way comparable to Lego, decided to make this cheap knock-off.


Yes, that's a dice basket at the top with a chain-driven axle that tilts the dice into the tower. Pathetic, isn't it? And it works about as well as you'd expect, which is to say not at all. I see this as an open admission from Joe that K'Nex are simply inferior to Lego in every respect, and this is a misguided attempt to cover that up by adding unnecessary bells and whistles to what is already a rather ugly design.

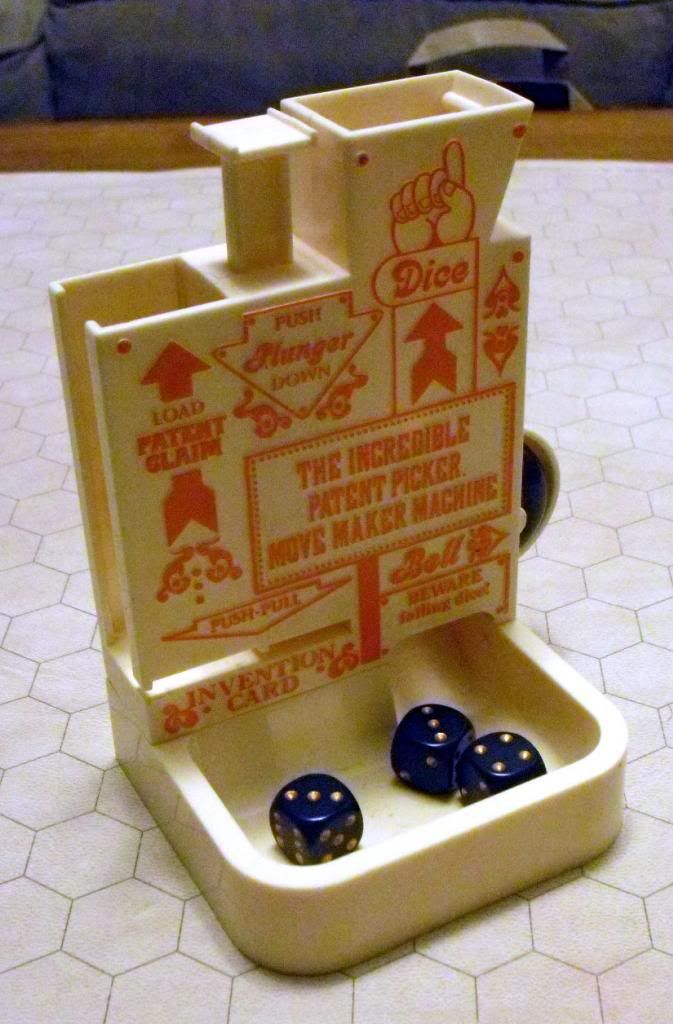
Fortunately, Joe came to his senses, and now he uses a dice tower that also comes from a thrifted board game, The Inventors.


And it actually has a bell on it. You stack the dice in the hopper on the right, push the punger next to it, and the dice ring the bell as they fall through.

And no discussion of dice towers and Lego would be complete without a tip of the hat to whoever came up with this brilliant thing here.

Edit: embedding the video failed, so I must link to it in a clumsy fashion instead. Thanks, Blogger.